
Searching for a fresh, mess-free way to decorate Easter eggs? We've got you covered.
Every Easter, our family experiments with new egg-dyeing techniques, and this year's standout is using shaving foam. It's surprisingly simple, quick, and delivers stunning, marbled results that kids absolutely love.
Kids can join in every step, from swirling colors to rolling eggs, and cleanup is a breeze since the foam wipes away easily.
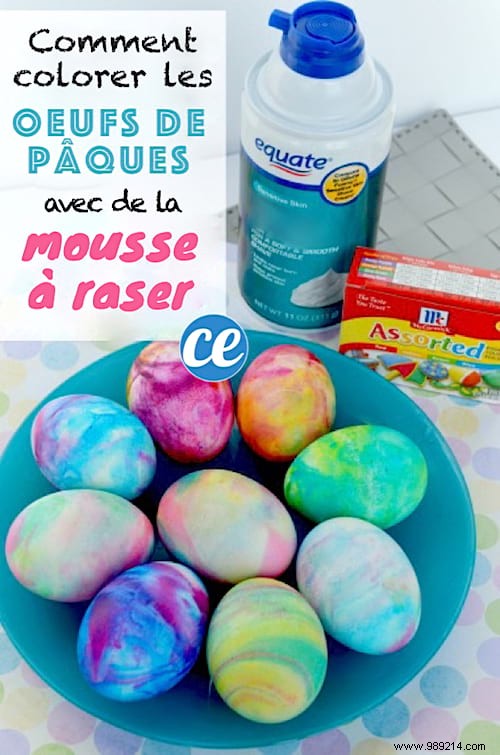
Plus, it's budget-friendly—shaving foam costs under €2 at most stores. Opt for foam, not gel, for the best effect.
Here's our tested guide to dyeing eggs with shaving cream for gorgeous Easter eggs:
1. Gather food coloring, 1-2 cans of shaving foam, and your flat-bottomed glass container.

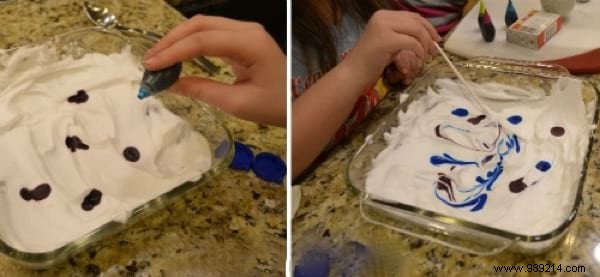
2. Spray 2-3 cm of shaving foam into the container's bottom.
3. Spread the foam evenly to prevent colors from sliding or mixing unevenly.
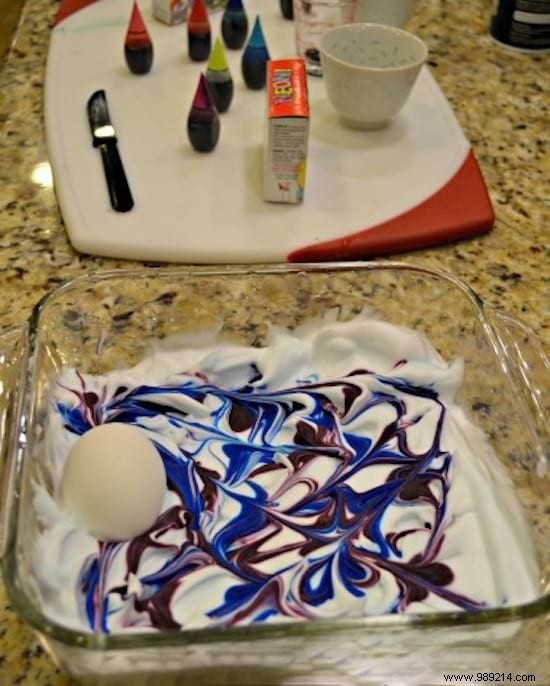
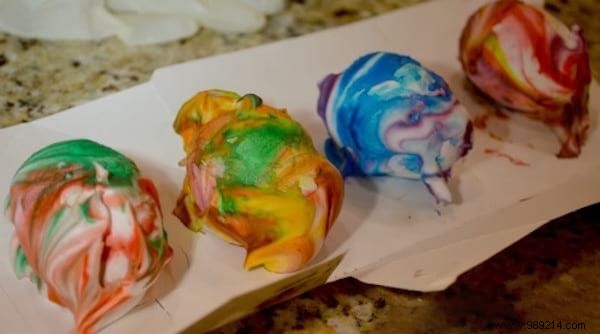
4. Use 2-4 colors max—too many mix into muddy brown.
5. Drip food coloring randomly onto the foam for better blending.
6. Swirl with a toothpick or stick for marbled patterns.
7. Place the egg on the foam at one end.
8. Roll gently across to the other side.
9. Lift and set on cardboard to prevent rolling.
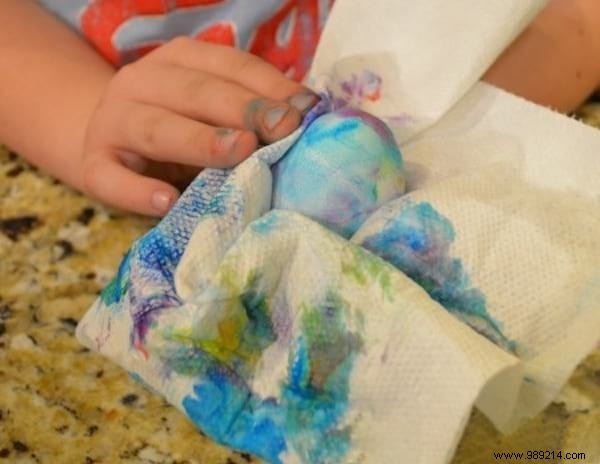
10. Let dry 5-10 minutes.
11. Wipe off foam with paper towel—colors stay vibrant!
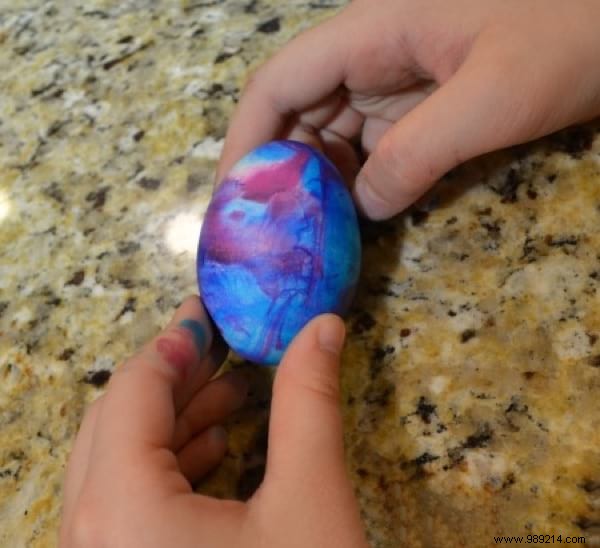
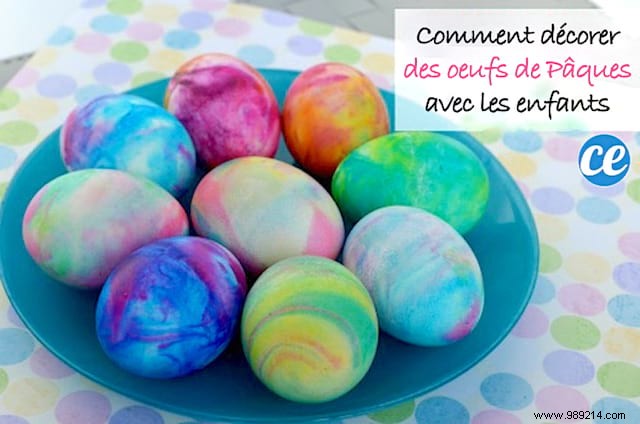
Your beautifully marbled Easter eggs are ready! Quick, easy, and so much fun.
Our kids were thrilled throughout—squirting foam, swirling colors, and revealing their creations. Try it with your family for unforgettable holiday memories and the prettiest homemade eggs.
Avoid eating foam-dyed eggs, as the porous shell may absorb ingredients. For edible versions, swap foam for whipped cream mixed with food coloring—perfect for post-craft salads and sandwiches!